

Floating Food Photography - Uncovering the Magic

Wingardium Leviosa! Any other Harry Potter fans out there? I am a major fan of the series, but today I am going to uncover the magic of floating food photography. And, no, there is no wand included. If you follow me on Instagram, then you know that each week I try and focus on some new technique to learn or improve on with my food photography. One thing I have always been fascinated by is the floating food photography. But how to do it?
You won't believe how simple floating food photography is!
After just a few minutes of referencing some video tutorials, including one from Skyler Burt and another from Peter McKinnon, I became surprised how, with just a few simple tools, you can make your food look like it is floating.
The tools you need for some type of floating food photography?
Some type of string or wire, fishing line is recommended.
Stands to tie the string to, or hanging hooks to stick to the background.
Some editing software.
A tripod or something to rest your camera on to ensure it doesn't move.
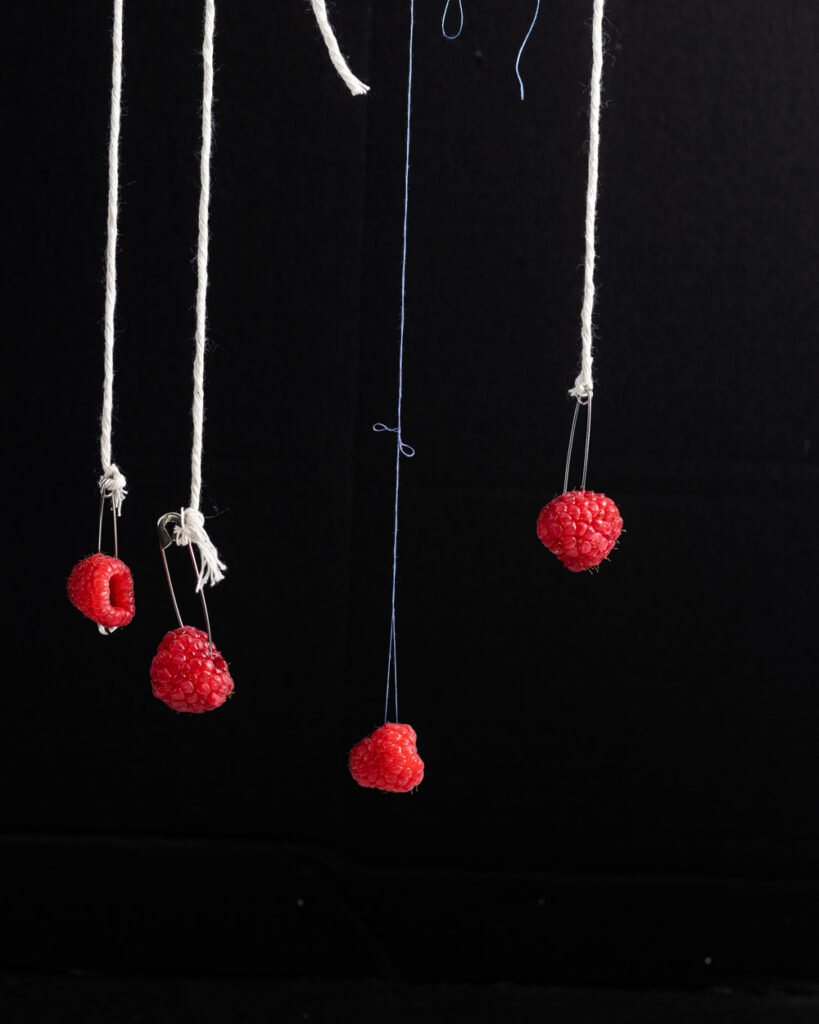
Setup to float raspberries
Depending on how you want the floating food to look, will depend on the setup. For levitating food to lay horizontally, you can check out this video by We Eat Together. For this photo, I wanted to make the raspberries look like they were naturally falling. So, I scrounged around the house to see what I had that could hang the raspberries. I literally hung these with kitchen twine and safety pins. I just tied the kitchen twine to a backdrop stand I had, and then tied the other end to the safety pin. Then, I thread that safety pin right through the raspberry.
It was a hack job to float the food, but it worked!
Floating Raspberries
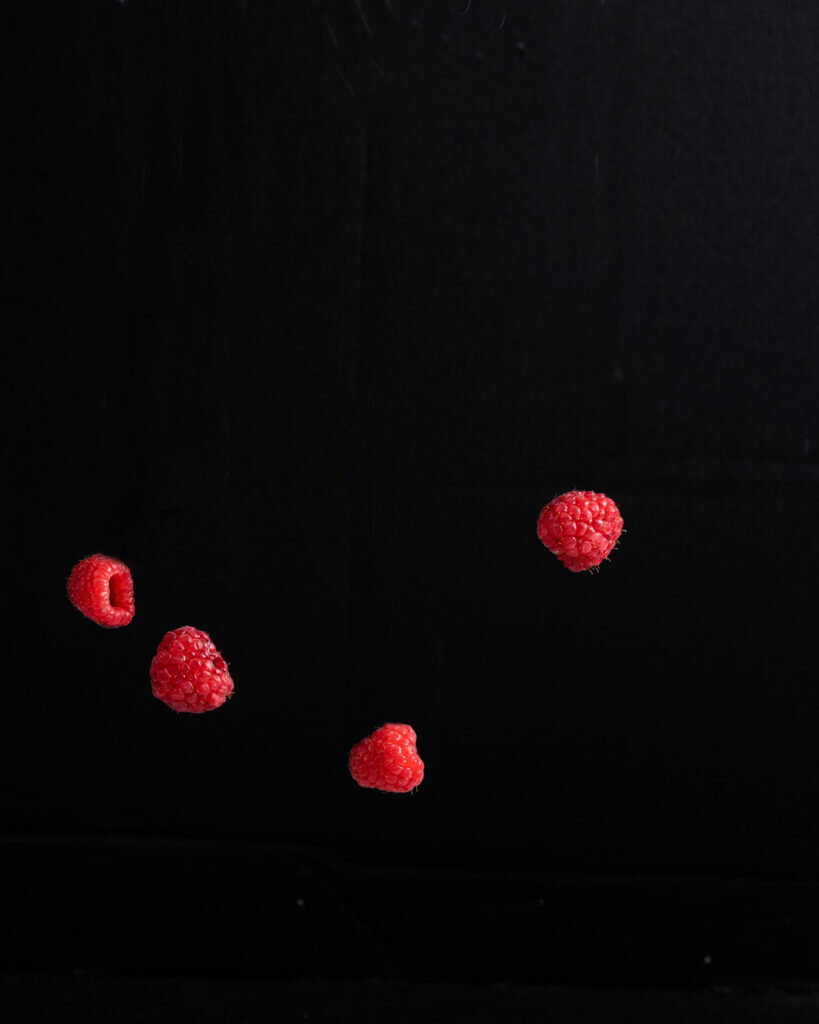
Now, here is where the tripod for this floating food photography comes into play. You want to take multiple pictures with the camera setup the exact same way, so that in the editing software, you can overlap the photos and easily remove the strings, and have everything in focus.
The first photo will be of the entire image you want, with your subject. This allows you to ensure that the floating food is where you want it, as are the angles, lights, and composition.
For the second photo, take a photo without the subject, but of the hanging food. This allows you to have a version with the floating food fully in focus. Of course, this will be a personal preference, when you complete composing the image.
The last photo will be of the background, without the floating food (optional, depending on the background).
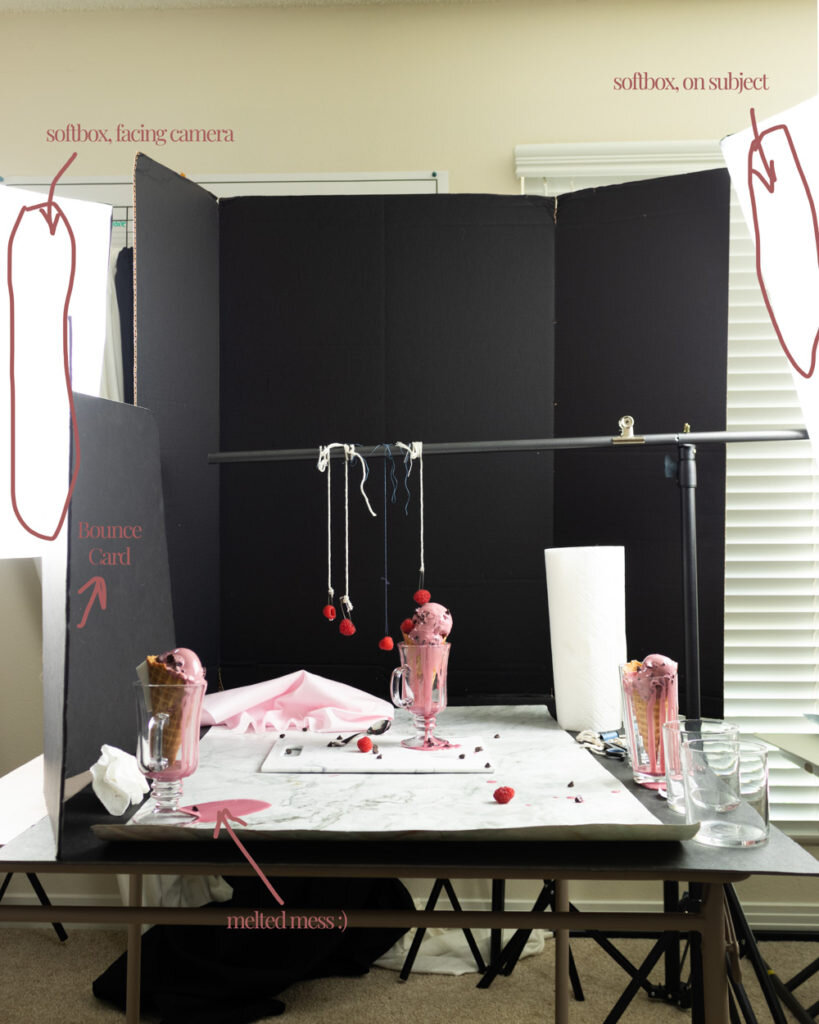
Floating Food Photography Setup
To finish creating your floating food photography...
Move your photos to Photoshop or another editing software, layer them over one another, and slowly edit out those strings using the clone or healing tool. Having all three photos will allow you to more easily manage those edits, specifically when you have complicated backgrounds. This way, you don't have to worry about re-cloning the background. As you erase the strings, the background will just appear as another layer behind the first photo.
Abra Cadabra...
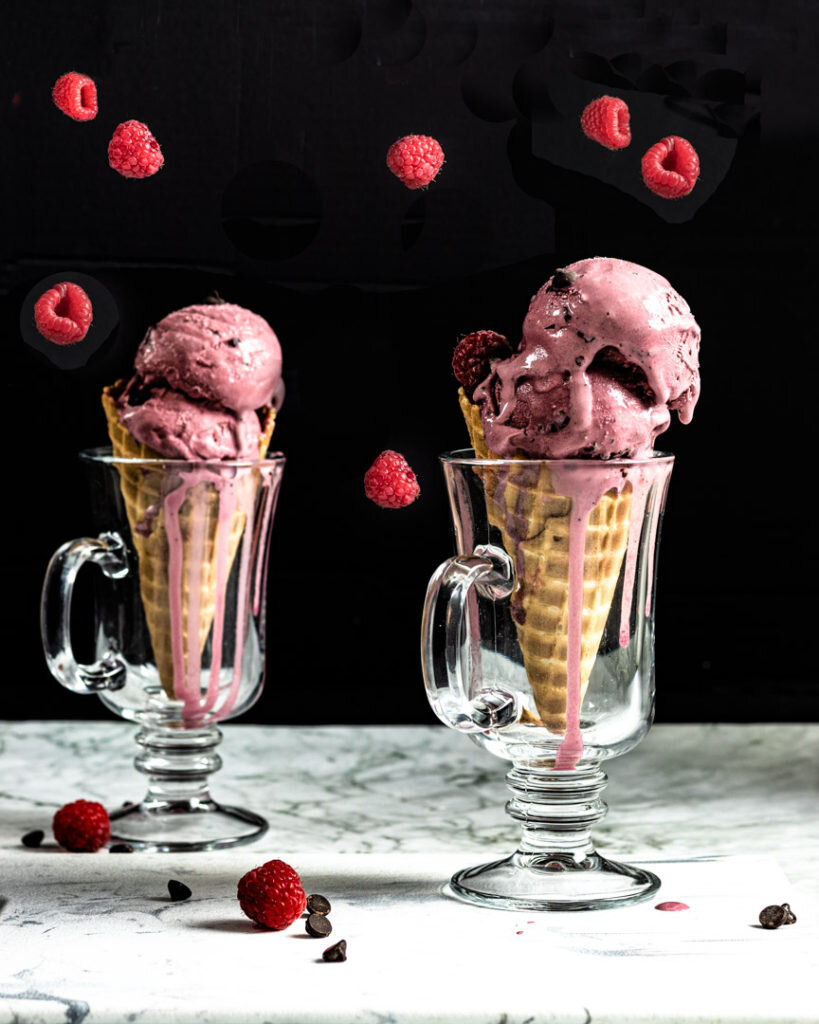
Like magic, your food floats.
Did you enjoy this article on Floating Food Photography - Uncovering the Magic? Let me know what you thought by leaving me a comment below. You can also follow me on Instagram and use the hashtag #masterfoodphotography whenever you try one of these techniques. I love hearing about how you're doing and seeing your creations!